Friday, January 13, 2012

Very definition of Masochism

Alright folks I couldn't wait any longer. I had to show you JUST how masochistic I am. Photos below are the before and after comparison of my fork lowers. One of the left is raw after hacksaw, files, and rough emery cloth. The one on the right is after wet sanding BY HAND with 220, 400, and 1000 grit sandpapers and an application of Mother's Mag and Aluminum polish.


It's taken me nearly a week of coming home after working and sanding that bad mama jamma!!! While it was excruciatingly painful to do, and I'm NOT looking forward to starting the next one, I believe it's worth it.


I plan on trying to get the other finished and both of them fully assembled and ready to go on the bike, along with my new seat fiber-glassed this weekend. We'll see if I'm being a little over ambitious. Till next time.

Little update (no photos)

Morning everyone, sorry I havne't been making any updates once again. I have a bad habbit of starting something on the motorcycle, getting REALLY into it and forgetting to take photos.

In my last post I mentioned cutting/shaving my front forks. Well, that's what I've been doing for the past week. It's been an EXTREMELY laborious process of hand wet-sanding the lower tubes in an effort to get them to a near mirror finish. I'm hopping to get one of them completely finished and assembled by sometime this weekend. I'll post a comparison between the new and old once I get there.

Wednesday, January 4, 2012

Bit of an update

Once again it's been a while since I've written an update. Here's a short and sweet update. It's getting cold here in Maine and an uninsulated garage make it sort of unpleasant to work on steel. Regardless I installed a propane heater in the garage to help with that. Here it is....
Now as far as the bike goes I fabbed up a head light bracket.
I cut the ugly chain guard flappy thing off of the left side cover of the engine as well as eliminated to old mount tabs/flanges for the mid controls that were no longer being used. Here's an before and after photo for comparison. No it's not the same side cover because I didn't want to ruin a perfectly good cover if it didn't turn out right.

I also have on order just over $500 worth of parts. Thing like carbuerator parts, fork seals and caps, seat mounts, etc. I also had an extra set of front forks which I shaved all unused caliper and fender brackets off of. I'll post and update with some pics of them once they are assembled again. The parts for assembly are in that parts order. Well till next time...


Monday, December 12, 2011

3 steps forward...

...5 Steps back. The other day while working on the bike I was standing behind it taking a look at her ass end and I noticed something wasn't right. Something wasn't right with the shocks. They looked a little cocked or twisted. I think something got a little crooked during the install and I didn't notice till now. Well, lesson learned. NEVER finish weld ANYTHING until EVERYTHING is THOROUGHLY checked and rechecked. So this is where my bike stands right now...
...not to F'ING happy!!! (SAD FACE)

Monday, November 28, 2011

Been a while

Okay...so WOW it's been a while. Well work has kept me away for a VERY long time. Basically spent the past 2-3 months in Vermont so I needed a couple weeks to recuperate and get my ducks in a row again. But I've been hard at work on the bike and have a few updates to make so here goes...

I apologize for the poor photos. My camera died and had to use the phone on my camera instead.

My temporary makeshift wiring harness.

First off....THE BIKE ACTUALLY RAN!!!! Yeah that's right she turned over and she sounds fierce...a bit wheezy but still FIERCE!!! One of the pistons was working a bit harder than the other so I checked the carbs out and there are some issues I need to work through there (read "I need to order floats").

One good reason to be single. No one to yell about the carburetors on the kitchen table.

I was successful in officially mounting my tank after many many trips to the hardware store. Had to install 1.5" coupling nuts into the neck gussets and back bone but it should prove to be rock solid. I also have rubber grommets in there so that the vibrations from the engine wont shake the damn thing apart.


I needed to basically remake the entire caliper retaining bar. The previous owner had something on there that looked like it had been run through a trash compactor about 3 times and then straightened out. Sort of hard to see in the picture with the shock and tie down strap in the way but you get the idea.


After my Dad visited to help me store the old bike in the basement he helped me out of a bind in how to mount the lever arm mechanism for the rear brake. It was quite ingenious and I was able to get the parts for free seeing is how they came off unused parts from the old bike. Thanx Dad!!!


The next bit of business was the kick starter. Due to the new pipes that I had made for the bike the kick starter was not actually able to fold up fully. It hit the pipe and because of this the end of the kicker actually sat in the sensitive part of the back of my knee. I wasn't too keen about this and it just didn't look good. So what's a guy to do? That's right...break out the blow torch and bend the crap out of it...heh heh!!!

Now it doesn't hit the pipes and wont gouge me in the back of the knee while riding.


Even with all the bending the kicker still functions perfectly well and the position of it to get the bike started didn't change at all. Job well done I do think so myself.

Those are the major accomplishments thus far on the bike. I still have the seat, lights, fenders, carbs, wiring, and final touches to go but at least I'm making progress once again. Well that's it for now, stay tuned.

Monday, August 8, 2011

Happy Hoe!!!

So the first thing one of my co-workers tells me this morning...."I've got a hoe for you in my car!"

Much to my dismay I got all excited and worked up for nothing. He had a friend that broke his gardening hoe and asked if I would fix it for him. He also told me the man had a sense of humor so I figured I'd have a little fun after welding the two pieces back together. Here's the result.

Isn't it a happy lil' hoe?

 Well after that was done I had the welder all set up and roaring to go I decided to do a little fab work on the bike afterwards. You should read that as "I got in a groove and lost all track of time and normal body function like eating and the need for water while sweating profusely."

Anyways, TC Brothers forward controls are now mounted. Have a gander.

Front quarter vew.

Left side view. Don't look at other side, the linkage isn't connected to anything.

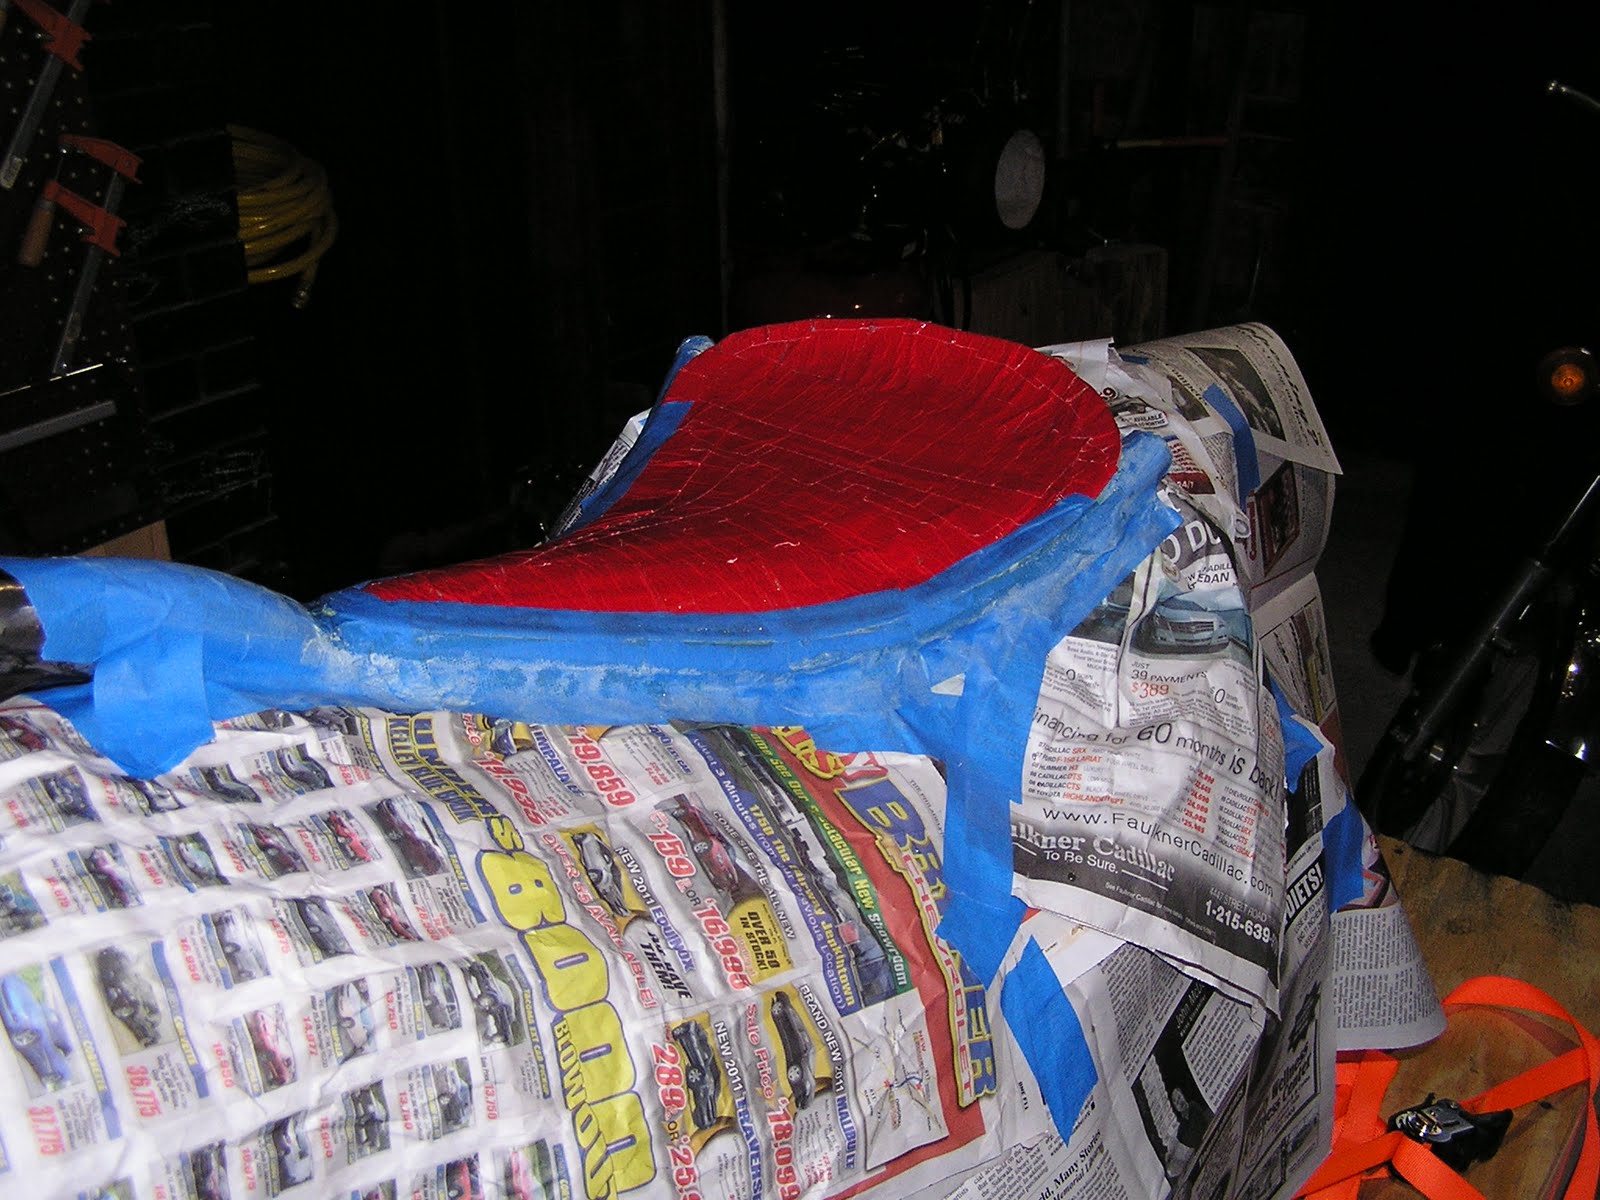
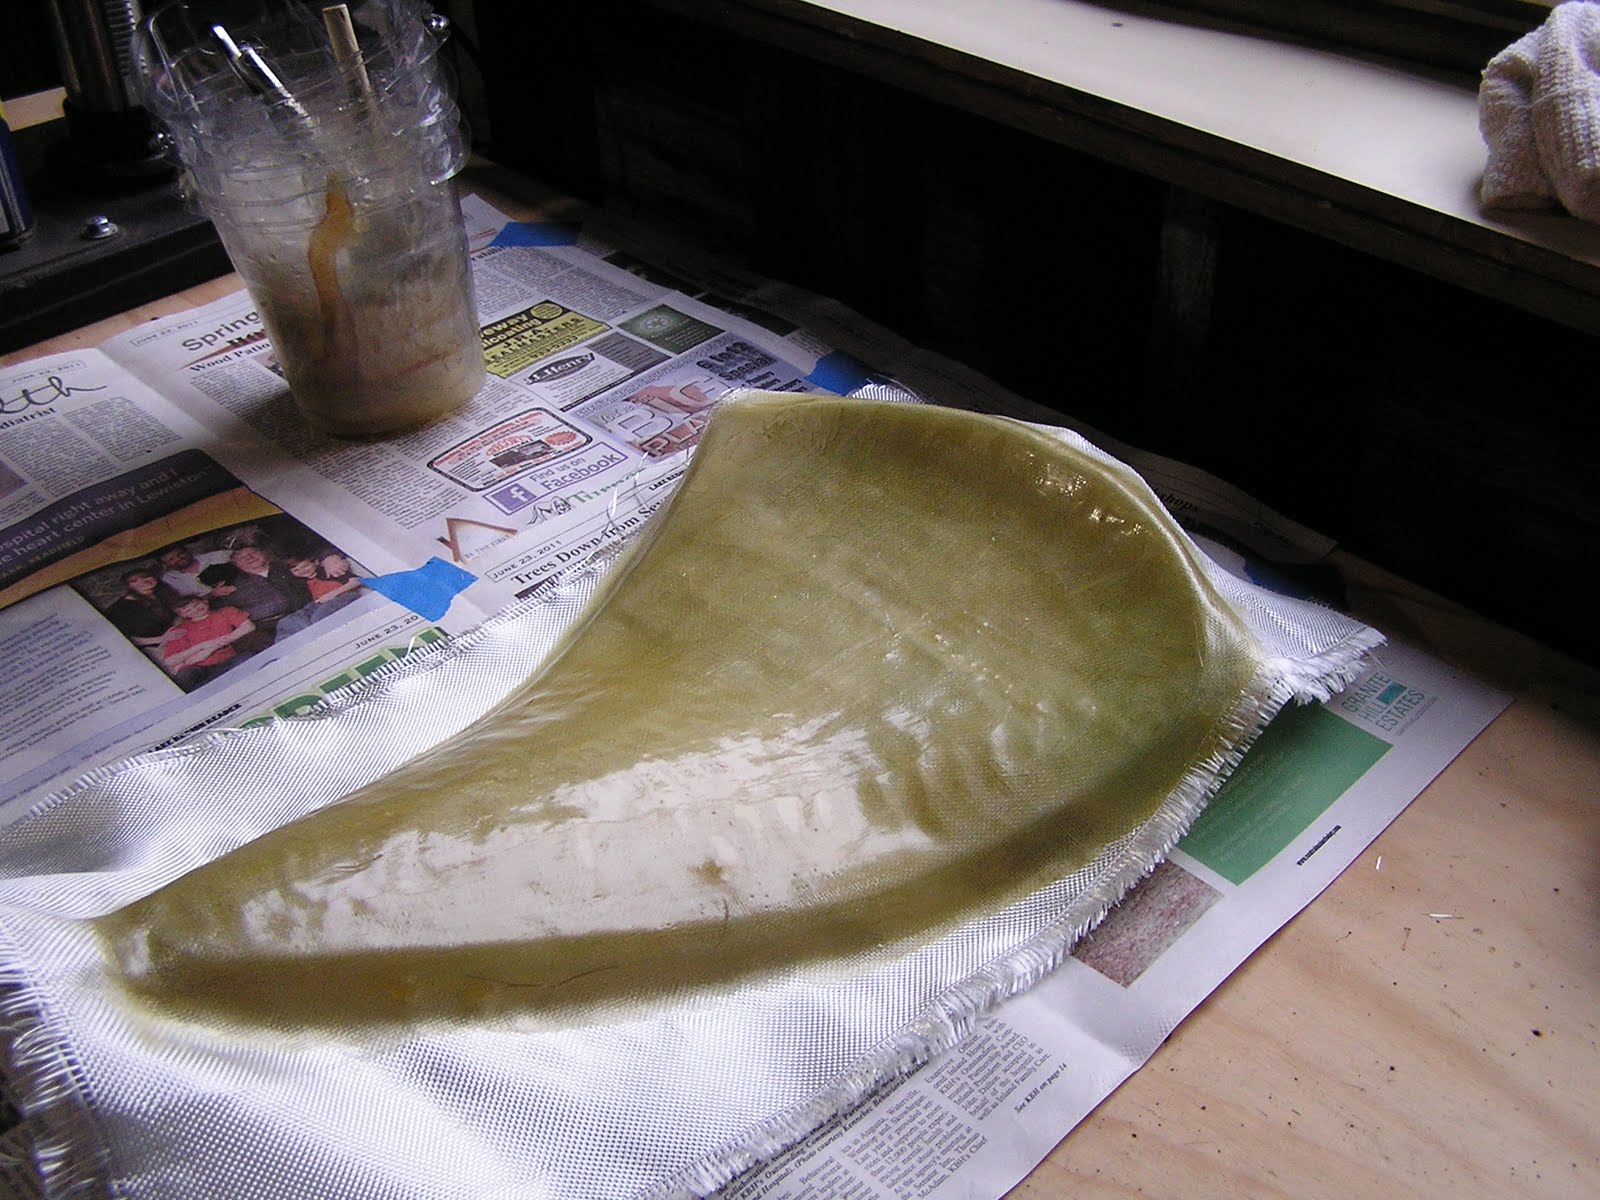
And as you can see the new custom fiberglass seat pan is all fabbed up. Still not mounted however. Here are a couple photos of the progress it went through. Sorry there aren't more but that fiberglass resin sets up QUICK with no time for photos.

Must cover everything around the mold so I don't get resin on the bike.


First four layers have been applied.


Close up of the finished product. Still needs one light coat of resin though. So not COMPLETELY finished.

Anyways. So there you have it. Wont be doing much more work over the course of this week. I've got to go UPTA CAMP!!! 

Saturday, August 6, 2011

I love Duct Tape!!!

Alright, so before I go into the biggest news of all I need to talk about my love of duct tape. While seemingly random this post does tie into building my motorcycle build.

After installing the Visual Impact Brat Kit onto my frame I realized shortly that the Sportster seat the bike came with would not work out. I browsed online but the more I browsed the more I realized it would be VERY difficult to find a custom built seat pan that would fit the style of my bike without looking out of place. Therefore I came to the conclusion I would need to build a custom seat pan myself. Well besides the fact I have no metal molding tools, even if I did my experience in that world is VERY lacking. What's the next best thing? FIBERGLASS!!! The do it yourself best friend!!!

In order to do the fiberglass however I would need a mold to form the glass around. Wait for it....here comes the Duct Tape love.

I cut out some cardboard and laid it on the frame to get an idea. Man did I EVER get an idea. What was originally meant to be a 30-45 minute job ended up lasting for 3 hours this morning. Half a roll of duct tape, 2-3 cereal boxes, and a USPS shipping box later this is what I've come up with....

So that's my mold. I've got to lay down 4-6 layers of glass, add some closed cell foam custom fit to rear end, then lay some fabric across it and TA DAA!!! I've got a seat.

Now without further delay here's the biggest news for this post....I can hardly contain myself so here's a photo. It's MUCH more explanatory....


THAT'S RIGHT!!!! My pipes came in and they F'ING SWEET!!! OH....I think I just pee'd myself a little!!!!