So yeah, it's been a long time. What's it been? Its been over two years or so?
Well I wish I could say that I spent those two years riding the snot out of my old lady of a bike. Unfortunately that's not the case. I only rode her for about a season and a half. After that season and a half she quit on me without a whimper to let me know what happened. The electrical just died. But I guess that's what you get for just throwing it together quick to get it on the road.
I was two hours away from home when she quit on me. Fortunately I had just got done visiting my good friend JD Blaine over at Panikswitch Cycles and a good samaritan trailered me back to his shop. We worked on it for a while to no avail. He ended up trailering me all the way back home. That's how good of a guy this man is. JD, if you're reading this I still owe you a beer, or two, or a case for that man!!!
Anyways, I've got a lot of photos of what I've been doing to the bike. They are spread over the course of a couple years and they aren't complete. What can I say, once I get wrenching I barely remember to eat let alone snap photos of what I'm doing.
So I decided to make a custom electronics box that would ride under the seat. First thing to do was to remove that piece of flat bar under the seat.
All removed.
Next create a paper template for the mold. I'll get into that later.
Next, mask off the area of the bike that's going to get fiber glassed so it doesn't stick to the frame.
Steal a couple of pieces of foam insulation form work as mold material.
Forget to take even more photos of shaping it and getting covered in lots of little foam pellets.
Tape up the mold so the fiberglass doesn't melt the styrofoam. Trust me, that gets messy.
This is how it will look once it's all done. Very low profile.
Yup, then forget to take photos of the entire process of making the electronics box and the bike sitting there for almost a year untouched. Then move all your stuff across two states and rent a house in Brunswick. Then wait till it gets too cold to start working on the bike because you have so much shit stuffed in the garage that you can't move. Then haul the motorcycle down a tiny set of steps into the basement so you can work on it.
More photos of all the cycle parts strewn about the basement.
More parts.
Alright I"m getting tired of typing and I still have a lot of photos to share. here I'm setting up to attempt a new seat pan design out of fiberglass.
Cut off the old lower fender mount.
Old lower fender mount on the floor.
Electronics box that I forgot to take all those photos of. Not all of that stuff will be in there when the bike is done.
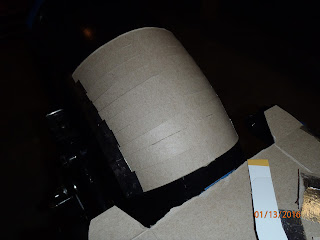
Cardboard and aluminum tape mold prep so I don't destroy the bike.
Lots of fun trying to turn a flat piece of cardboard into a double curved shape.
Mold foundation all fixed up.
Two layers of aluminum tape.
Don't forget the wax so you can separate the fiberglass from the mold. Even with this stuff it's a bitch to get apart.
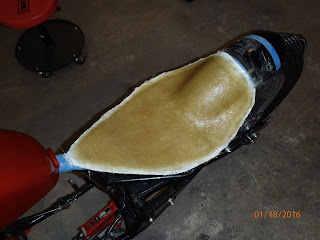
Like I said. Once I get going I forget to take photos. This is two layers of glass fabric laid down.
Four more layers of glass fabric and two layers of matt laid down and cut to shape.
Underside with a cut line drawn out.
More cutting.
After cutting and shaping.
Removed the old ugly ass neck gussets. Don't worry. New ones have already arrived from the inter webs.
All those power tools in the basement and I still have to use a tiny saw blade and a needle file to shape the holes to accept T-Nuts in the seat pan so my ass doesn't fall off the bike.
Close up.
T-Nuts installed. Basically after this I realized I f'ed up on the whole process. I tried to account for full rear suspension travel so that the rear tire wouldn't hit the fender since the fender would be mounted to the frame now instead of the swing arm. It came out looking like Fido's butt after I installed the shocks.
Fido's butt. And that's after I played with it a while to try and make it look better. The fender is supposed to be snug under the seat pan. If it sat there it would look like a dirt bike fender. Not sure what I'm going to do. I'm quite frustrated and perplexed. So I moved onto the front end of the bike.
Cut off all the ugly taps that weren't used on the lower triple tree.
Shaped it with a grinder and hand files. Dusted off the TIG welder and mounted a new headlight mount on the lower triple tree. Welds don't look TOO bad for not having welded in years. But lets put it this way, the headlight is NOT going to fall off the bike.
Well that's it for now. More to follow for sure.


